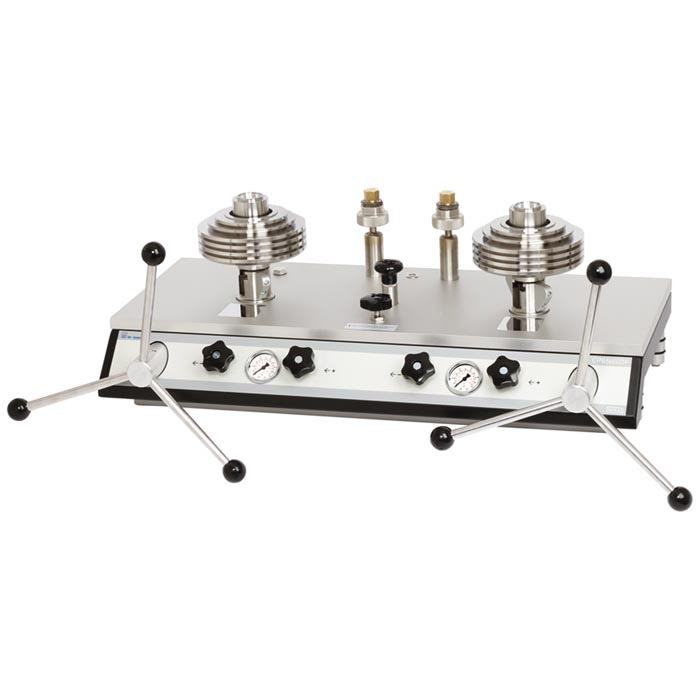
CPB5600DP piston pressure gauge

Apps
A reference instrument that can be used to verify differential pressure measuring instruments under static pressure
The reference instrument for measuring, adjusting, and calibrating pressure gauges in factories and calibration laboratories
Complete stand-alone system for on-site use
Features
Measurement range (= static pressure + differential pressure): pneumatic type up to 40 MPa, hydraulic type up to 160 MPa
Total measurement uncertainty: 0.008% differential pressure + 0.0001 % (1 ppm) Static pressure
Retrievable factory calibration certificate (standard) in line with national standards; DKD/DAkkS verification certificate available upon request (optional)
can run stably for a long time, only need to re-verify every 5 years
The weight set is made of stainless steel and aluminum and can be adjusted according to local gravity
Description
Mature benchmarks
Piston pressure gauges are the most accurate instruments on the market for calibrating electronic or mechanical pressure gauges, measuring pressure directly (P = F/A). The balance is manufactured from high quality materials, minimizing measurement uncertainty and providing long-term stable operation. Due to the above characteristics, this type of piston-type pressure gauge has been used in the calibration laboratories of factories and industrial, national institutions and research laboratories for many years.
Run independently
CPB5600DP uses an integrated pressure source and pure mechanical measurement principle, ideal for on-site maintenance and overhaul.
Basic principles
Pressure is the pressure within a unit area. Based on this, the CPB5600DP uses a precision-engineered piston-cylinder system as the core component to generate individual test points by loading weight groups.
The weight group is best divided into different quality levels, so that the weight of the load on the balance is proportional to the target pressure. By standard, these weights are manufactured to standard gravity (9.80665 m/s²), but users can also adjust to local gravity and DKD/DAkkS calibration.


